Coffee and walnut loaf
Serves 8.
Ingredients
225g / 8 oz caster sugar
150 g / 5 oz butter
120 g / 4.5 oz plain flour
75 g / 3 oz self raising flour
1 tablespoon instant coffee powder
3 eggs
75 g / 3 oz soured cream
75 g /3 oz walnuts
Icing:
150 g / 5 oz icing sugar
1 tablespoon instant coffee powder
50 g / 2 oz walnuts
Method
Preheat the oven to 180 C/gas mark 4.
Place the butter and sugar into a bowl and mix together, adding the eggs until creamy. Fold in the flours and add the soured cream, coffee (disolved in 1 tablespoon of warm water) and walnuts.
Grease and line the base and sides of a 900 g /2 lb loaf tin. Spoon the cake mixture into the tin and level the surface. Bake for approximately 55 minutes until risen and golden and a skewer inserted into the cake comes out clean. Cool on a wire rack.
To decorate, mix together the icing sugar and coffee powder into a bowl. Add a tablespoon of water to make a thick icing and spread over the cake loaf. Decorate with walnuts.
For related articles click onto:
Banana loaf recipes

Click here for the 'Seeds of Eaden' seed shop
Tomato soup is by far the worlds most popular soup variety. And why wouldn't it be, it's flavoursome and hearty, but did you know that it is also ever so simple to make? What's more, the cost of half a dozen tins of Heinz 'cream of tomato' soup can turn out to be anything from £ 3.60 up to £ 9.64 depending where you shop. Using fresh vegetables from scratch, the equivalent amount of home made soup will cost around £ 3.00, but more importantly, by cooking it yourself you will know that the ingredients in your soup are free or any additives or preservatives, and the taste will be far superior.
This recipe for tomato soup is easy to prepare, simple to cook and uses basic and readily available produce. In fact, there is no reason why you can't grow the majority of these ingredients in the garden. In which case the cost for this soup will almost be negligible.
Take this advice - if you have ever thought about making home made soup then try this recipe first. It won't let you down.
Ingredients
2lb/900 grams of tomatoes - peeled and quartered ( or 2 tins of chopped tomatoes)
1 1/2 lb / 700 grams of butternut squash - cubed
2 x Medium Onions - chopped
1 x carrot - roughly sliced
1 x leek - sliced
1/2 a small swede - cubed
3/4 pint of chicken or vegetable stock
1 large nob of butter or 1 tsp of olive oil
Trees and shrubs are both woody plants that are very similar in appearance. Shrubs differ from trees as they do not have a single, clear trunk but instead are multi stemmed near ground level. Shrubs are usually shorter than trees, below 6 metres, with stems of a diameter less than 8 cm diameter. They have several perennial stems that may be erect or may lay close to the ground, although none of these stems will be dominant.
There is a degree of overlap between shrubs and other plant groups. A number of plants can become shrubs or trees depending on growing conditions. Lilac (Syringa) is a shrub that grows on a single stem. Some trees such as Japanese maple (Acer palmatum) have multiple trunks. Shrubs may grow to the size of a small tree. Cornus mas, the cornelian cherry, is described as a shrub although it grows to 8 metres. Malus sargentii, the sargent crab apple, grows to 4 metres but is considered a tree.
Shrubs can be deciduous or evergreen, and are generally broad leaved plants with the exception of some small conifers such as juniper. Small low shrubs such as lavender, periwinkle and thymes are only woody at their base and are termed sub-shrubs.
With their fragrant flowers, striking fruits, decorative stems, attractive foliage and architectural habits it is no wonder that shrubs are so popular. Naturally growing in a wide spectrum of habitats, there is a shrub suitable for every soil and aspect.
Some shrubs such as witch hazel (Hamamelis) have stunning autumn colour with leaves turning from yellow through to orange and red. Others have a profusion of small flowers which cover the stems completely (Ceanothus), whilst others have giant blooms (Paeonia). Some shrubs such as holly (Ilex) and Pyracantha bear decorative berries during the winter. Dogwoods (Cornus) display bright winter stems which range from vivid red to bright yellow.
Many shrubs respond well to pruning back to a central frame. They can also be shaped into tight forms through topiary as they have dense foliage and close branches. They can be used as hedges, screens and background plantings. Often they are grown in a shrub border or mixed border among annuals and perennials.
For related articles click onto:
What is a tree?
What is a potager?
What is a vegetable?
What is the difference between a conifer and a deciduous tree?
Which plant has the largest seed?
Which plant has the largest leaves?
Which plant has the largest flower?
Vegetable crop rotation
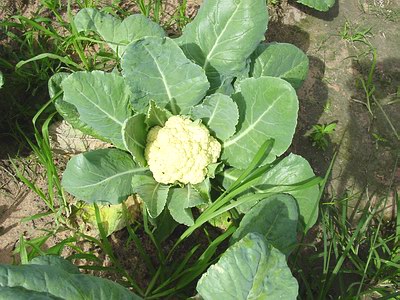
Cauliflowers are considered fussy vegetables to grow. This is because they require a rich soil, careful planting, regular water and pest control or else they will fail to produce anything other than tiny button heads.
It took me a while to successfully grow cauliflowers. My first attempt was damaged in the sun and turned yellow, and my next attempt grew small and spindly due to not receiving enough water.
You can choose from summer, autumn and winter cauliflower varieties. Summer varieties can be sown under glass in January ready for transplanting in late march or early autumn and are ready to harvest June/July. Alternatively, plant outdoors in early April and transplant in June for a August/September crop.
Autumn varieties can be sown outdoors between mid April and May, transplanting in June, and are ready to harvest mid September to end November. Winter varieties can be sown outdoors in May, transplanting in late July, and are ready to harvest late February till May.
Bed Preparation
Dig over the bed in autumn/early winter and add plenty of well rotted manure or compost. Allow several months to pass between digging and planting to ensure the soil is well consolidated. In spring add a general purpose fertiliser such as Growmore. Do not fork over the surface of the bed prior to planting but instead just tread down gently and rake.
Sowing cauliflower direct into a seed bed
Sow the seeds very thinly in drills 1.5 cm deep, in rows spaced 15 cm apart. Cover gently with soil and water Seeds will germinate in 7-12 days. Thin the seedlings within the rows to 7 cm apart to prevent then becoming spindly and weak.
When the seedlings have established 5 or 6 leaves they are ready for transplanting. Water well the day before and carefully lift the plants ensuring you retain as much soil around the roots as possible.
Sowing cauliflower into pots
Fill a seed tray with John Innes seed and cutting compost, tapping the tray to settle the compost. Level gently with a flat piece of wood but avoid compacting the soil. Set out the cauliflower seeds individually within the tray, approximately 25 seeds in total. Lightly cover with compost using a sieve. Place the tray in a larger tray holding 2cm of water until the soil is moist and the surface of the compost turns from light to dark brown.
 Remove from the water tray and place in a well lit area such as a windowsill or bench in a heated greenhouse. Either cover with glass or place in a propagator until the first seedlings emerge or leave uncovered and water frequently by spraying daily. Do not allow the compost to dry out (or become waterlogged). The seedlings are ready to transplant when they are showing two strong leaves.
Planting
Plant firmly ensuring the seedlings are set at the same level as in the seed bed or pot. Space at 60 cm apart. Water gently.
Maintenance
During the growing season hoe regularly to remove any competing weeds. Water regularly, especially when young, as a shortage of water will mean very small heads develop. You will need to protect the crop from birds so hang a few Cd's or similar around the plot. During the summer protect the cauliflower heads from the sun by covering it with a few bent leaves. During the winter protect the cauliflower heads from the snow in the same way.
When harvesting your cauliflowers cut early in the morning when the heads have dew on them, or midday if frosty weather in the morning. Lift the plants and hang upside down in a shed to keep for up to three weeks.
For related articles click onto:
Feeding plants
Growing rhubarb
Growing potatoes
Growing tomatoes
How to grow broccoli from seed
How to grow cauliflower from seed
How to build a cold frame
How to Grow Agave from Seed
How to grow artichokes from seed
How to Grow Asparagus from Seed
How to grow basil
How to grow beetroot from seed
How to grow cabbage from seed
How to grow carrots from seed
How to grow coriander
How to grow cucumbers from seed
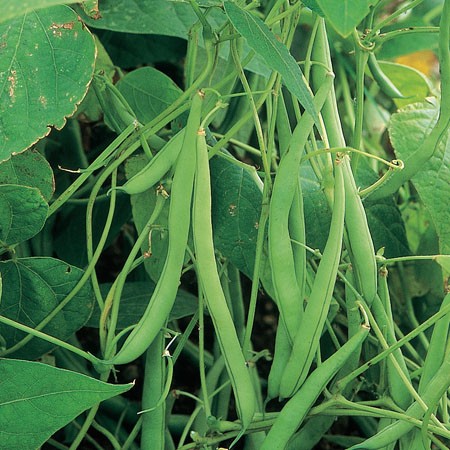
How to grow french beans from seed
How to grow leeks from seed
How to grow lettuce from seed
How to grow onions from onion sets
How to grow onions from seed
How to Grow Pumpkins from Seed
How to grow runner beans from seed
How to grow strawberries from seed

This creamy chicken dish is simple to make but tastes delicious. Serves 4.
Ingredients
1 small onion, chopped
1 small leek, chopped
4 rashers Smokey bacon, chopped
3 garlic cloves, chopped
4 chicken breasts, cubed
40g butter
3 tablespoons flour
3/4 pint milk
Mushrooms, sliced
2 tablespoons Olive oil
Salt and pepper for seasoning
Method
Cut the chicken breasts into cubes and fry in olive oil for 5 minutes. Add the onion, leek, bacon and garlic and cook for a further 5 minutes until softened.
Melt the butter in a pan and add the flour to make a rue. Slowly add the milk, stirring continuously, until a white sauce has been formed. Add the mushrooms, chicken, garlic and onion to the sauce and cook gently for a further 15 minutes.
Season to taste with salt and pepper.
Serve with rice.
For related articles click onto:
Butternut squash with leek and stilton
Beef stroganoff
Chicken fried rice
Chicken supreme
Chicken risotto recipe
How to roast pork
How to roast turkey
Recipe for Asparagus Quiche
Recipe for cauliflower cheese
Recipe for Italian pizza
Recipe for Italian tomato sauce
Recipe for Quiche Lorraine
Recipe for pea salad with mint
Recipe for pickled cucumber
Recipe for Plum Chutney
Recipe for Salmon with lemon and herbs
Recipe Spaghetti bolognese
Recipe for spinach and broccoli fritatta
Recipe for tomato soup
Spiced brussels sprouts
Spicy meatballs in tomato sauce
Vegetarian recipes - vegetable fried rice